References
텐서는 배열이나 행렬과 매우 유사한 데이터 구조체입니다. 파이토치에서 텐서는 모델의 input/output 그리고, 모델의 파라미터를 표현하는데 사용됩니다.
텐서는 numpy의 ndarray와 유사한데, 텐서는 GPU나 다른 하드웨어 가속기에서도 사용할 수 있습니다. 실제로, 파이토치의 텐서와 넘파이의 배열은 기본 메모리를 공유할 수 있어서, 서로 간의 변환에서 데이터를 복사할 필요가 없습니다. 이에 대해서는 아래에서 조금 자세히 살펴보도록 하겠습니다. 텐서는 automatic differeniation(자동 미분)에 최적화되어 있는데, 이에 대해서는 이번 포스팅에서 다루지는 않습니다.
시작하기 앞서, 두 패키지를 import 합니다.
import torch import numpy as np
Initializing a Tensor
텐서는 여러가지 방법으로 초기화할 수 있는데, 그 방법들은 아래와 같습니다.
Directly from data
data = [[1,2], [3,4]] x_data = torch.tensor(data)

From a Numpy array
np_array = np.array(data) x_np = torch.from_numpy(np_array)
From another tensor
x_ones = torch.ones_like(x_data) # retains the properties of x_data print(f"Ones Tensor: \n {x_ones} \n") x_rand = torch.rand_like(x_data, dtype=torch.float) # overrides the datatype of x_data print(f"Random Tensor: \n {x_rand} \n")
With random or constant values
shape = (2,3,) rand_tensor = torch.rand(shape) ones_tensor = torch.ones(shape) zeros_tensor = torch.zeros(shape) print(f"Random Tensor: \n {rand_tensor} \n") print(f"Ones Tensor: \n {ones_tensor} \n") print(f"Zeros Tensor: \n {zeros_tensor}")
위 코드에서 shape는 텐서의 차원을 표현하는 파이썬의 튜플입니다. torch.rand, torch.ones, 그리고 torch.zeros는 생성할 텐서의 차원을 나타내는 튜플을 파라미터로 받아서, 해당 차원의 텐서를 생성합니다.
Attributes of a Tensor
텐서의 attributes에는 shape, datatype, 데이터가 저장된 device가 있습니다. 이들은 아래의 방법으로 확인할 수 있습니다.
tensor = torch.rand(3,4) print(f"Shape of tensor: {tensor.shape}") print(f"Datatype of tensor: {tensor.dtype}") print(f"Device tensor is stored on: {tensor.device}")
torch.dtype
텐서에서 사용가능한 타입은 여러가지가 있으며, 사용가능한 데이터 타입은 아래 링크를 참조바랍니다.
torch.Tensor — PyTorch 1.13 documentation
Shortcuts
pytorch.org
torch.device
torch.device는 torch.Tensor가 할당되거나 할당될 디바이스를 나타내는 객체입니다.
device type을 나타내며(ex, 'cpu' or 'cuda), optional device ordinal을 포함합니다. optional device ordinal은 만약 GPU 장치가 여러 개일 때 어떤 장치에 할당되는지를 나타냅니다. 예를 들어, 'cuda:0' 등으로 표현됩니다.
저의 경우 M1 macOS를 사용 중인데, GPU를 사용하려면 다음과 같이 device를 설정해주면 됩니다.
torch.layout
torch.layout은 텐서의 메모리 레이아웃을 나타내는 객체이며, 현재 torch.strided(dense tensor)와 torch.sparse_coo(sparse tensor)를 지원합니다. sparse tensor는 현재 beta support입니다.
Operations on Tensors
텐서에는 산술 연산, 선형 대수, 행렬 조작(transpose, indexing, slicing), 샘플링 등 100개가 넘는 연산을 지원합니다. 해당 연산들을 확인하려면 공식 문서를 확인바랍니다. 여기에서는 몇 가지 필요한 내용들만 살펴보도록 하겠습니다.
각 연산들은 GPU에서 동작할 수 있는데, 기본적으로 텐서는 CPU에서 생성됩니다. 만약, GPU나 다른 디바이스에 명시적으로 텐서를 이동시킬 수 있습니다. 저의 경우 현재 M1 macOS를 사용 중이기 때문에 다음과 같이 CPU 텐서를 MAC의 GPU 텐서로 이동시킬 수 있습니다.
if torch.backends.mps.is_available(): tensor = tensor.to("mps") print(tensor)
만약 NVIDIA GPU(CUDA)를 사용한다면 다음의 커맨드를 통해 GPU로 이동시킬 수 있습니다.
# We move our tensor to the GPU if available if torch.cuda.is_available(): tensor = tensor.to("cuda")
Standard numpy-like indexing and slicing
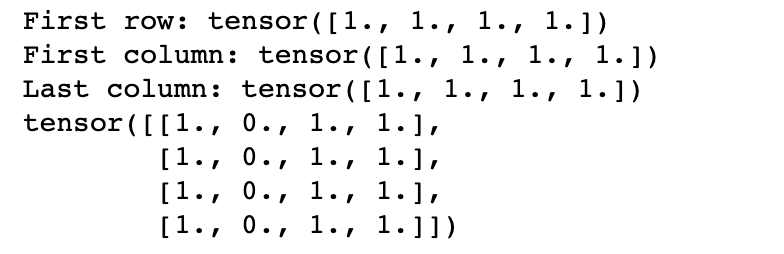
기본적으로 텐서에서는 넘파이와 동일한 인덱싱과 슬라이싱 기법을 사용할 수 있습니다.
tensor = torch.ones(4, 4) print(f"First row: {tensor[0]}") print(f"First column: {tensor[:, 0]}") print(f"Last column: {tensor[..., -1]}") tensor[:,1] = 0 print(tensor)
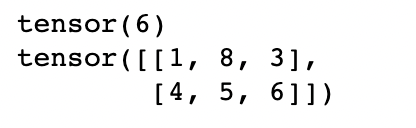
x = torch.tensor([[1, 2, 3], [4, 5, 6]]) print(x[1][2]) x[0][1] = 8 print(x)
concat, stack
torch.cat을 사용하면 주어진 차원으로 텐서들의 시퀀스를 합칠 수 있습니다.
t1 = torch.cat([tensor, tensor, tensor], dim=1) print(t1)

torch.stack은 torch.cat과 유사한데, 주어진 차원 인덱스 위치에 새로운 차원을 생성하여 텐서의 시퀀스를 합칩니다.
t1 = torch.stack([tensor, tensor, tensor], dim=1) print(t1)
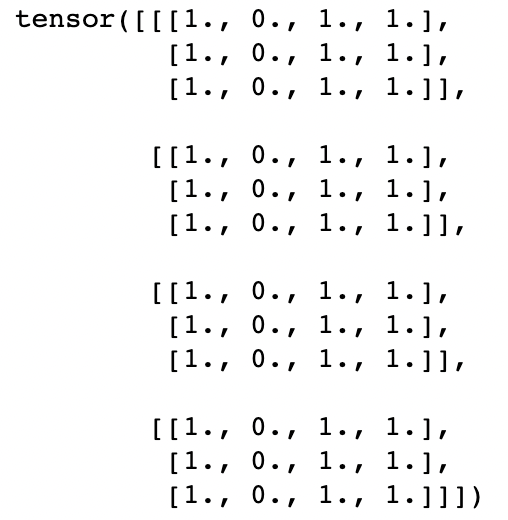
위의 경우, (4,4) 텐서 3개를 dim=1 위치에 새로운 차원을 생성하면서 합치고 있습니다. 그 결과 생성되는 텐서의 차원은 (4,3,4)가 됩니다.
Arithmetic operations
# This computes the matrix multiplication between two tensors. y1, y2, y3 will have the same value y1 = tensor @ tensor.T y2 = tensor.matmul(tensor.T) y3 = torch.rand_like(y1) torch.matmul(tensor, tensor.T, out=y3)
위에서 사용한 @, .matmul은 모두 행렬 곱 연산을 수행합니다.
# This computes the element-wise product. z1, z2, z3 will have the same value z1 = tensor * tensor z2 = tensor.mul(tensor) z3 = torch.rand_like(tensor) torch.mul(tensor, tensor, out=z3)
위에서 사용한 *, .mul은 행렬 요소 곱(element-wise product)을 수행합니다.
Single-element tensors
텐서의 모든 값을 더해서 element가 하나인 텐서를 만들 수 있습니다. 그리고 이러한 텐서에 item() 함수를 사용하면 파이썬 numerical value로 변환할 수 있습니다.
agg = tensor.sum() print(agg) agg_item = agg.item() print(agg_item, type(agg_item))

item() 함수는 요소가 하나인 텐서에 대해서만 사용할 수 있습니다.
In-place operations
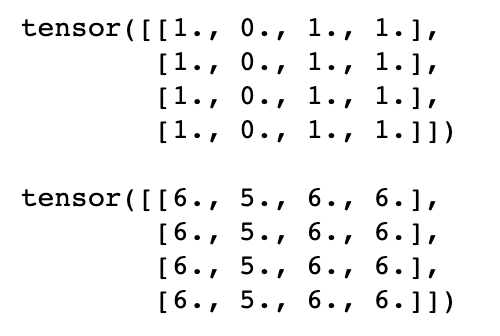
in-place operations는 연산의 결과가 연산을 수행한 텐서에 저장되는 연산을 지칭합니다. 이러한 연산들은 '_'가 suffix로 붙습니다. 예를 들어, x.copy_(y)나 x.t_()는 x를 바꿉니다.
print(f"{tensor} \n") tensor.add_(5) print(tensor)
Bridge with Numpy
처음에 언급했듯이, 파이토치의 텐서와 넘파이의 배열은 서로 메모리를 공유하며, 한 쪽의 데이터를 변경하면 다른 쪽의 데이터 또한 변경되게 됩니다.
t = torch.ones(5) print(f"t: {t}") n = t.numpy() print(f"n: {n}")

위와 같이 생성한 텐서에 in-place add를 수행하면,
t.add_(1) print(f"t: {t}") print(f"n: {n}")

넘파이 배열의 값까지 변경된 것을 볼 수 있습니다.
반대의 경우에도 동일합니다.
np.add(n, 1, out=n) print(f"t: {t}") print(f"n: {n}")

Tensor Views
파이토치는 view tensor를 지원합니다. view tensor는 base tensor와 동일한 데이터를 공유하며, 불필요한 명시적인 데이터 복사를 방지하므로 빠르고 메모리 효율적인 reshaping, slicing, 그리고 element-wise operations을 가능하게 합니다.
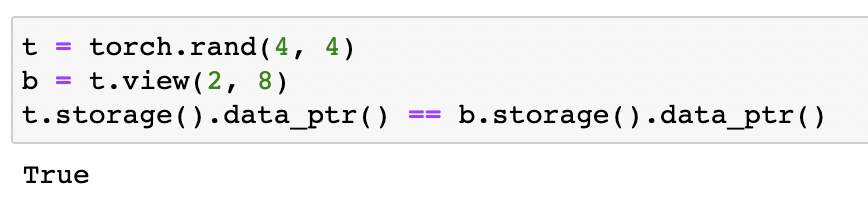
Tensor t와 view tensor b가 서로 동일한 메모리를 가리키고 있는 것을 볼 수 있습니다.
views는 base tensor와 데이터를 공유하므로, view에서 데이터를 수정하면 base tensor에서도 수정된 데이터가 반영됩니다.
일반적으로 파이토지의 operations는 output으로 새로운 텐서를 리턴합니다. 그러나 view ops의 경우, output은 input 텐서의 view이며 불필요한 데이터 복사가 일어나지 않습니다. view를 생성할 때, 데이터 이동이 발생하지 않으며 단지 동일한 데이터를 해석하는 방법만 변경합니다. 연속적인 텐서의 view를 취하면 잠재적으로 비연속적인 텐서를 생성할 수 있습니다.
transpose()가 위에 대한 내용을 잘 보여줍니다.
base = torch.tensor([[0, 1],[2, 3]]) print(base.is_contiguous()) # True t = base.transpose(0, 1) # `t` is a view of `base`. No data movement happened here. print(t.is_contiguous()) # False # To get a contiguous tensor, call `.contiguous()` to enforce # copying data when `t` is not contiguous. c = t.contiguous() print(c.is_contiguous()) # True
base tensor의 view를 리턴하는 op들은 link를 참조하시길 바랍니다.
'ML & DL > pytorch' 카테고리의 다른 글
| [pytorch] Tutorial - Build the Neural Network (0) | 2022.11.29 |
|---|---|
| [pytorch] Tutorial - Datasets & DataLoaders & Transforms (0) | 2022.11.26 |
| [Pytorch][Kaggle] Cats vs. Dogs Classification (1) | 2020.12.07 |
| [Pytorch] softmax와 log_softmax (그리고 CrossEntropyLoss) (0) | 2020.12.02 |
| [Pytorch] MNIST Classification (2020/12/02 수정) (0) | 2020.12.01 |


댓글